My dear friend had her bridal shower on Cinco de Mayo, and in honor of all things enchilada, we were given these adorable succulents in tomato sauce cans. Aren't they CUTE?! My friend has a pretty clever sister. After the shower there were quite a few extra plants. I have no shame in admitting that I snagged as many of those bad boys as I could without looking too crazy. It's ok though, I gave the bride waffles.
After getting them home, I did a little research on succulents. God bless Google. How did our parents learn anything back in the Dark Ages before internet searches? It seems succulents are pretty laid back plants, so long as you cover a few basic needs.
- The soil needs to be very light and drain easily, and the pot MUST have drainage holes. Wet roots for too long will kill the plant dead.
- Let the soil dry out between waterings. Like, completely dry, if you want. Heh, this is how I've been watering my ivy plant for years. The fat leaves on succulents store water, so as long as the leaves feel firm it shouldn't need to be watered. (EDIT: This is LIES! Smaller leaved plants can't store as much water as the big boys, so if you mix sizes in a planting, you have to cater to the little guys. I learned this the hard way and lost two out of the four plants. Just water once a week or so and they'll be fine, but soft leaves are bad. Letting your one year old re-pot them while you're not looking is also bad. That's how I lost a third. I'm down to just the sturdy guy on the far left of the picture.)
- Any plant that looks this awesome needs to be in an equally awesome pot. Yes, this is an official rule. That I made up. I have that kind of power.
The first thing to catch my eye was this. Know what it is?
That's right! NOT a planter! All the pots I have, and I pounce on this thing. It's a clear plastic thingy that you're supposed to put over the square tissue boxes. Turn it upside down, and you have a clear planter with a ginormous drainage hole! I was given this at my bridal shower almost 4 years ago and never used it. Don't ask me why I kept it. I keep everything.
In order to make it into a planter for the succulents I was going to need to block up the hole enough that soil wouldn't wash out. I also needed an appropriate soil mix for the plants to grow in. I could have bought the "cactus mix" potting soil at my local wally world, but my Googling skillz informed me that it was pretty much regular, peat-based potting soil mixed with sand and perlite. I already have the potting soil and sand, so I decided to just buy a bag of perlite. Same price as the bag of cactus mix, but now I can make special soil mixes in the future. My soil mix was:
- 1 part potting soil
- 1 part perlite
- 1 part sand
How can you tell if the sand is salty? Take some salt in you hand, check to see if anyone is looking, and lick it. Do it. I double dog dare ya. Ok, ok, it's kinda gross, but I couldn't think of a better way to check. Unfortunately, I didn't think about salty sand until after I finished the project. I'm going to try flushing the pot well with plain water, and then again with water and a touch of vinegar, just to be on the safe side. (see THIS article for more detail)
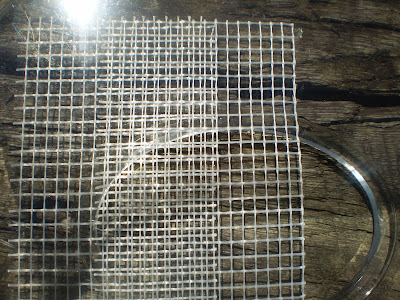
Now that I have my soil, I need to prep my pot. Whilst perusing my beloved Dollar Tree, I found a roll of fiberglass mesh tape, the kind used to patch drywall. Genius! On the way out I also snagged a bag of decorative river rocks. Because I have no self control in this store. Everything is actually a DOLLAR, for crying out loud! I love this place! (I even worked there one holiday season, but that's a different story) I used the mesh tape in strips, overlapping them and staggering them slightly to make the holes even smaller. We're trying to hold back sand, after all.
I covered the hole with probably a dozen strips, leaving plenty of hangover to help hold it in place. Because of the size and location of the hole, the tape is supporting quite a bit of weight. I could have used more tape than I did.
I used a little over half the river rock in the bottom of my new "pot." Then I filled it with soil and planted my little succulents into their new home. I sprinkled the remaining rocks around the top and stepped back to admire my awesomeness.
So that was $4 for the perlite, $1 for the rocks, and $1 for the mesh tape. I now have a trendy little succulent arraignment for $6! AND, I don't have to look at a stupid, useless tissue box thingy and wonder why I still have it! The happiness could kill me DEAD!


No comments:
Post a Comment