Sunday, November 18, 2012

Apple Butter, a.k.a. the easiest stuff to can, EVER!

Ah, fall! The leaves have long since left our trees, but there are still oodles of autumn produce to be had. I have been buying apples by the half bushel from a sweet gal who sold at the farmer's market over the summer. She joined up with my awesome grassfed meat source, and now they both deliver bi-weekly a few miles from my house. You really can't top the convenience, especially this time of year! These apples are good eatin'! They are grown locally with a minimum of pesticides, and you can taste the difference right on the skin. Store bought apples have such a bitterness to their skins, but my farm apples aren't bitter in the least.

Now, a half bushel is a huge amount of apples, especially when a lot of them are on the smaller side. I couldn't refrigerate them if I wanted to. At first this wasn't a problem. My boys go through apples like crazy. They could polish off a 3lb bag of apples in three or four days, tops. Bulk was not only more convenient, but cheaper! Is it just me, or have there not been any major apple sales this year? I don't recall pears going on sale when they were in season, either. Stupid inflation.

Where was I? Oh yeah, bulk apples. (count yourself lucky, I almost went on a political/economic rant right there) The first half bushel of apples, my boys were in heaven. I left the box on my kitchen floor and they were able to help themselves throughout the day. Two weeks later, they had just about finished the box when I picked up the next half bushel. This time, they slowed way down. I think they're suffering from apple burnout. After a week, the apples began to bruise, which dramatically increased the rejection rate. AC does not dig blemishes on fruit. At all. If his banana has the slightest brown on it, I have to hand it to him strategically so he can't see the spot before he eats it. Parenting is all about strategy and outwitting the other side. Or is that in battle? Eh, same thing.

That's right, I said bedtime.
What is a gal to do with half a box of bruised apples? Well, can them, of course! I immediately hopped on pinterest (better than google in my world) and started searching for different ideas. BAM, it hit me. Apple butter. But not just apple butter, apple butter made in the CROCK POT! I absolutely LOVE apple butter, but the store bought stuff is guaranteed to be laced with high fructose corn syrup. Where's the fun in that?

Let me tell you, apple butter in the crockpot is so rediculously easy, and so dadgum DELICIOUS, that I immediately had to make more. I promptly ordered another half bushel, and even told them they could include imperfect and bruised apples. It really doesn't matter with apple butter, and I figured it helped them unload produce they might have been stuck with otherwise.

I'm writing down what I did mostly to remind myself for next year. If you want a more formal recipe, this one at pickyourown.org is really informative. This is a great project to start in the evening after kids go to sleep.

I started by slicing as many apples as would fit in two of my crockpots. (5qt and 7qt) The apples shrink a lot as they cook down, so I decided to cook down two crocks, then combine them when it came time to can them up. I left the skins on my apples, both for nutrition and bulk, but if you insist on a perfectly smooth apple butter, I'd recommend cutting them off. My stick blender couldn't get every last piece, although it is mostly smooth.

Then, I topped each crock with 1/4 cup sugar (next time I use brown sugar), cinnamon, cloves, allspice, ginger, and a wee bit of cardamom. All spices were eyeballed, because I can't be bothered to measure them. I add the initial sugar to help draw out moisture from the apples. There is absolutely no need for additional liquids when I cook them like this. Fewer liquids = less simmering time. I opted for fresh ginger over dried, simply because I LOVE fresh ginger and I always have some on hand. I'll save the ground ginger for gingerbread. Oh, gingerbread... now I'm hungry.

Stay on target, Maria, stay on target.

I am now envisioning myself flying across the surface of the Death Star.

I think I'm off target.

Ahem...
GINGER. I was talking about ginger. Be forewarned, if you use fresh ginger, it will not break down while cooking and the stick blender won't catch it. I happen to love bits of fresh ginger. Others (Hubby included) don't. Your call. Unless I'm doing the cooking, then it's my call. Sorry, Hubby.

Once all the spices were in, I threw the lid on, set it to low, and went about my evening. Every few hours, I took a peek to see if the apples had shrunk down. If there was room, I diced up another half dozen apples and stirred them in. I continued adding until I had used up the entire half bushel. As soon as all your apples are added, you can ignore the sucka for the rest of the night.

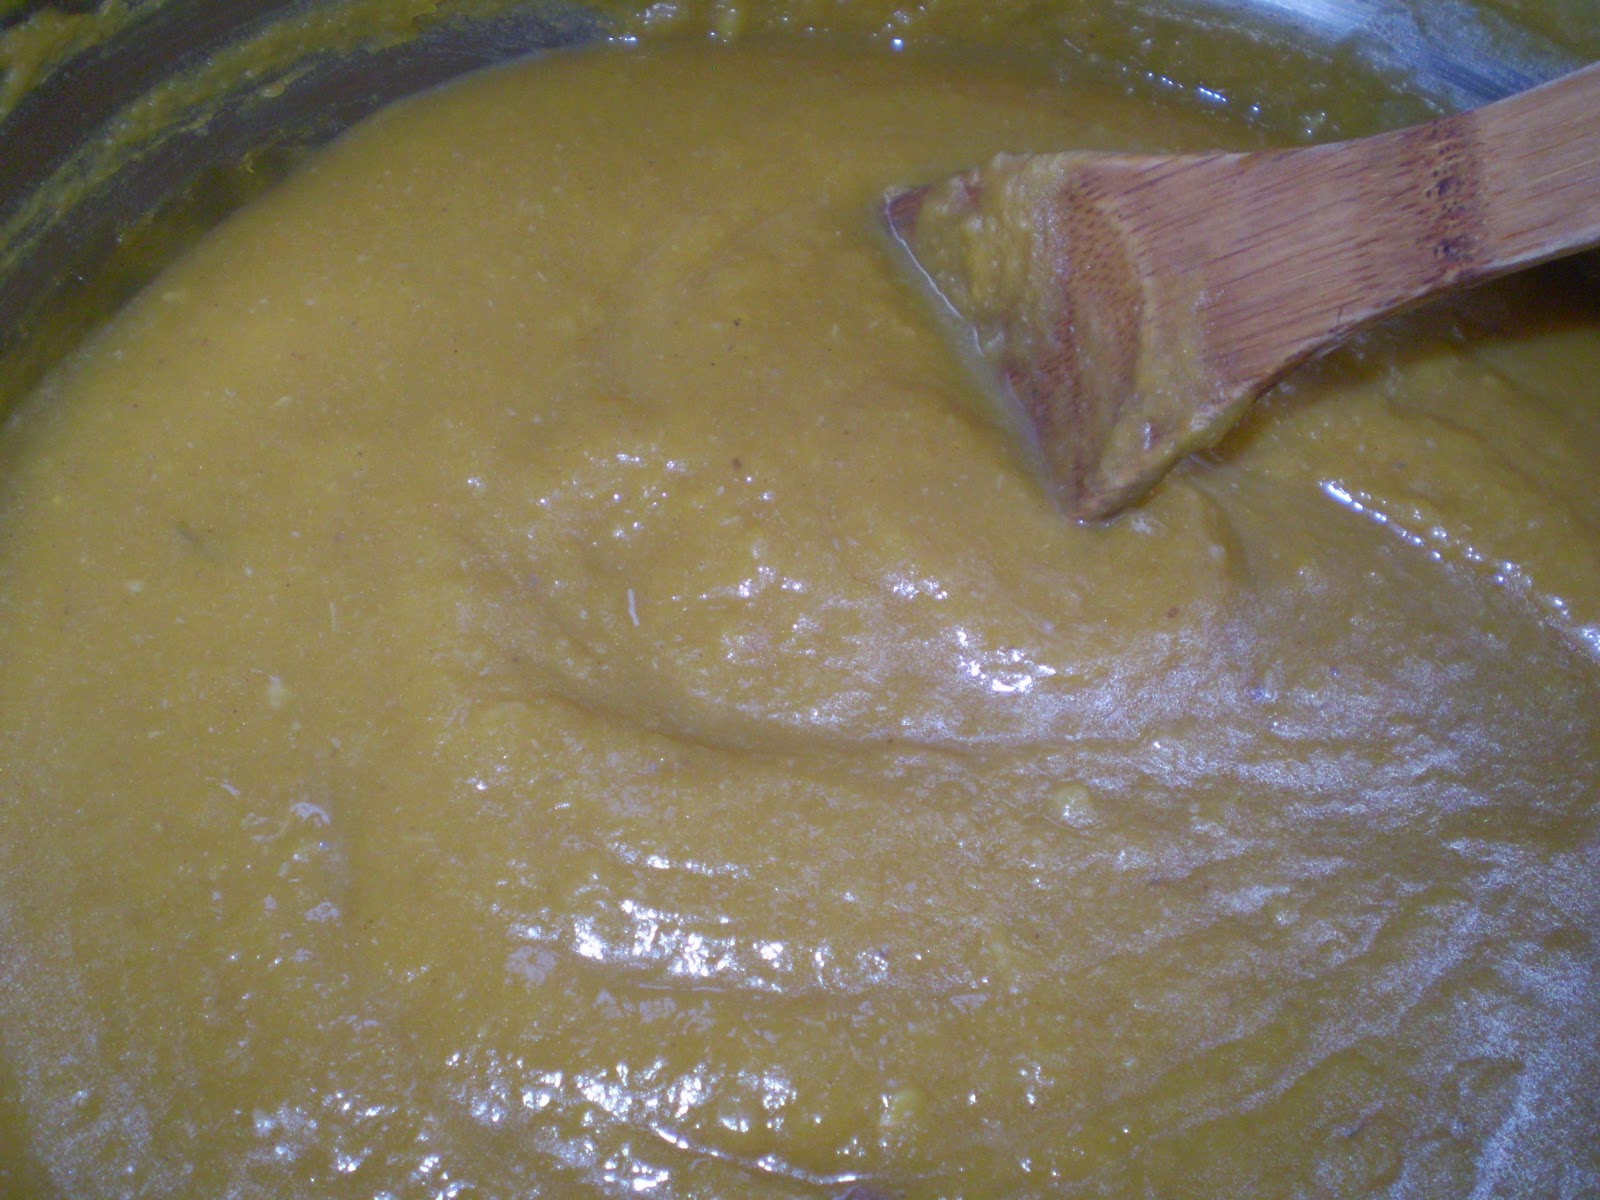
In the morning, my kitchen smelled like apple magic and happiness. For real. The apples were super soft and ready for the stick blender. If you don't have a stick blender, I have heard of people using hand held mixers. At this point I suggest tasting it, and adding sugar and spices to suit your tastes. Immediately after I finished canning my batch, I happened upon a recipe that included vanilla extract. WHY didn't I think of that? I'm totally doing that next year.

The next step kinda depends on your crock pot. You want to get your puree up to a simmer. One of my crocks was simmering on low, while the other one had to be cranked up to high. Once it's simmering, you can take the lid off and let it cook down over the course of the day. Stir it every once in a while, or whenever you can't resist leaning over the pot to sniff the goodness. As soon as it is as thick as you like, you're done. Hot foods are always more runny than room temp or refrigerated, so it might help to scoop some on a plate and chill it. You can do this whenever you're curious. Or hungry.

I started simmering my apple butter about 9:00am and it was done about 4:00 in the afternoon. To make life easy, I decided to combine everything into my 7qt crock (it BARELY fit) and leave it be until the kids went to bed at 8:00. Next step: canning!

The link I incuded above gives very thorough canning instructions, so I will send you there for the details. Below are just my notes.

  • A half bushel of apples netted me 21 half-pint jars of apple butter, or approximately 5 1/2 quarts. I'm hoping this will last us a year!
  • From start to finish, the canning part of things took me about 4 hours, but I know I could pare that down quite a bit.
  •  I have two water bath canners, and when you're doing big batches like this it is AWESOME! It cut my processing time in half, although I think my poor stove wept for joy when I was done. Canners are huge!
  • I always forget how long it takes to bring the water to a boil initially. It must have taken close to 2 hours between the two of them. Factor that in if you want to start canning as soon as kids are asleep. You can have the water heating during the bedtime routine.
  • One HUGE canning tip I learned this time around, is to add a splash of vinegar to your canning water. Canners, especially the racks, will rust. Guaranteed.  Adding vinegar to the water works some mojo and not only prevents but REMOVES rust from the pot and rack! Be forewarned, if your rack is super rusty and you soak it in vinegar water, you will get all sorts of nasty floaty bits in the water. Better to give bad rust a soak before you use it to can.
I am REALLY impressed with how easy this was. I essentially spent two evenings on it, with a little stirring in between. The first evening was chopping apples, a job that can be done in front of the TV (or radio, if you're feeling old-timey). The second evening was the canning, but considering it was only four hours (and most of that waiting for water to boil), there was very little work involved. Very few actual hours invested, and I now have a year's worth of sweet apple butter. I'd love to try it in baking, but for that I may have to make another batch. These jars are going to be as closely guarded as my spiced blueberry jam!

(I know, it's cruel to do an apple butter post without showing apple butter. But since I can't find my camera I'm going to post this now and update with a few beauty shots later.)

Friday, November 9, 2012

Garden Recap 2012

Not my 'maters. Image Credit
This year I managed to clear a little 4'x8' patch in the backyard, and in it I crammed four Roma tomatoes, three jalapenos, three sweet frying peppers, and four cabbages. Yes, they all somehow fit. The cabbage ended up a bust, because I planted them late and they were devoured by some little buggy.

Only parts of it managed to get 6-7 hours of full sun, but somehow my little patch of tomatoes and peppers did phenomenal! That is, until they got walloped by a nasty combo of septoria leaf spot and late blight. I didn't notice it until it had gotten a strong foothold, and I was reluctant to spray heavy pesticides on them. It's a shame, too, because my Romas were absolutely covered in tomatoes! Once the blight got to them, it was over. Unripe tomatoes were falling off the vine daily, and whatever managed to hang on was covered in blight spots. I did get enough good fruit to try several batches of fermented salsa. That was interesting. I'm still getting the hang of fermenting. Most of my attempts have worked out well, but many of them are too salty for me to enjoy. The salsa wasn't too bad though, and I think I'd try it again if I had the chance. It was far less effort than canning!

My peppers fared better than the tomatoes against the spot/blight combo. To my surprise, the blight didn't cross over until very late in the season. There was very little effect on production, thank goodness, but I had no idea how many jalapenos I could get from three plants! WOW! I only wish I had been more prepared for the harvest, because most of it ended up sitting in my kitchen until it went bad.  I did make a small batch of candied jalapenos (also called cowboy candy!) and those turned out really good! It's horribly full of refined sugar, but the syrup is my favorite part. Sweet and hot, it's awesome on burgers or even salads! I definitely want to try that again next year! Assuming I get my butt organized in time...

I think my plants did well in their plot for two main reasons:
1) I fertilized them weekly for the first half of the season (non organic. sorry), and kept them reasonably well watered despite a very dry, hot first half of the summer.
2) The full sun lasted until early afternoon, effectively shading the plants during the hottest part of the day. Normally that would be a problem, and I think it was part of my blight problem during the wet second half of the season, but for our unusually hot, dry early summer it was exactly what they needed.

The worst part of all this, is thanks to the intense leaf spot and blight, I will not be able to plant tomatoes or peppers in my plot for at least three years. To add insult to injury, a few scraggly pepper plants that I had planted out front also came down with blight, so I have no place to plant tomatoes in-ground without digging up a new plot. Nuts.

So what have I learned this past year? First, if I'm going to grow something, I had better be prepared with half a dozen different ways to use up the harvest, and at LEAST one that requires little or no effort. Wasting produce is to have wasted every minute and every dollar spent on gardening. Second, I need to make sure I inspect my plants regularly. If I had kept a closer eye on my tomatoes I might have caught and eliminated the blight before it wrecked my plants and poisoned my soil.

I have already thought a lot about the past year and how I want to improve, but that will have to wait until my next post. Yep, I'm already planning next year's garden. What can I say, I'm a committed planner!

Monday, September 24, 2012

Cauliflower Beef Soup


I'm going mad with soup making right now. As fast as I can whip up a batch of broth it disappears into a flavorful soup. This one is fairly understated, but I left it that way on purpose. I could have easily used more onion or rosemary, but this version has just enough to taste good and leave the hearty beef front and center. Feel free to add stuff to your heart's content!

Speaking of rosemary, I think everyone should grow it! My head explodes with happy every time I run my hands through the branches and inhale the intoxicating aroma. Think I'm exaggerating? Sneak into my yard and try it yourself. (just kidding, go away. I'm probably still in jammies) It is such an easygoing plant, and so far has tolerated hot, dry conditions as well as wet, humid conditions. The real test is to see if I can get it to live through the winter. Mine is in a pot and will have to be brought inside. I don't water plants so well... If it dies I can always strip the dried leaves off the branches and still have oodles of beautiful rosemary to grace my cooking.

Mmmmm, so good!

CAULIFLOWER BEEF SOUP     Yield: Approx. 3-4quarts

2 large cauliflower heads, woody stems removed and florets broken into large chunks
1/2 red onion, roughly chopped
1 4-inch branch of fresh rosemary
Dash of black pepper
1 - 1.5 quarts beef broth (this won't cover the florets but it will cook fine)
1 lb ground beef (I used grassfed beef from my friendly local farmers at Spring Valley Farms. Love those guys!)

Simmer everything until the florets begin to break down as you stir. Using a stick blender or a regular blender, blend everything until smooth. Some florets will mock you and refuse to be pureed. Don't fight it. Give them the stink eye and move on. The beef will add enough texture that you won't be bothered by the occasional cauliflower chunk. If the soup is thicker than you like, now is the time to add more broth. Place the pot back on the stove. Drop little balls of ground beef in the soup and bring everything to a simmer. Do not stir until the meatballs are cooked through! They could break apart and ruin the coolness. This freezes fabulously!

Thursday, September 20, 2012

Laundry Soap is Dope


Here is another overdue project from my Personal Challenge 2011. Better late than never!


Homemade laundry soap is pretty stinkin’ popular anymore, with half of people saying it works as well as Tide, and the other half saying it’s a waste of time. I used a pretty standard recipe:
1 cup Borax
1 cup washing soda
2 cups soap shavings*

I just grate up the soap, stir in the Borax and soda, and call it a day. Easiest stuff ever. Lots of people swear by the liquid version, but I just can’t be bothered. Plus, from what I’ve read, it’s a bit trickier to get the proper consistency. With the powdered stuff I just toss about 2 Tablespoons to a large load of laundry. I also keep a 50/50 mix of borax and washing soda on hand for really grimy loads. I like to put the soap in first, run some hot water on it for a few seconds to speed up the dissolving process, and then after I load the washer with clothes I switch back to cold water. Seems to be working fine for me! Can’t say that it works worse than any other brand I’ve used, and I’ve found I don’t really miss all the fragrances (ok, sometimes).

So far I’ve used Fels Naptha laundry bar soap, Zote laundry bar soap, and Kirk’s Castile bar soap. I think they all work about the same, but I don’t care for the ingredients or smell of the Fels Naptha or Zote. Both knock me on my ass when I'm grating them up, and I don't care to stand too close to the container when I scoop it out, either. (The scent is extremely faint in the clean clothes, thankfully) Kirk’s is about as close to old-fashioned lye soap as I have been able to find in stores, but I suspect it would leave a residue on the clothes over the long term.The two laundry bars are meant to wash away cleanly, while body soap is typically designed to leave a fine layer of glycerin or other skin softening substance behind. Sometime this winter I want to try making my own laundry soap from lard and lye, just for the comparison. I really can't settle on which I prefer, so for now I just bounce back and forth.

Action shot! WEEEE!

Oh, and I rock a Downy ball full of white vinegar as my "fabric softener." It normalizes the ph of the clothes after all that washing soda, and adds to the disinfecting power. I have never smelled the vinegar on the clothes when doing it this way, and my towels are reasonably soft.

*A note on measuring soap shavings. This has to be the most confusing part of all the laundry soap recipes floating around the internet. Many recipes only specify "1 bar," however the popularly used soaps vary quite a bit in size! The gold standard, Fels Naptha, is 7oz, while Kirk's is 5oz, and Zote is a whopping 14oz! Ivory, another popular choice, is 4 or 5 ounces. BUT, there's an additional problem to just the bar size. Some of them contain a lot more water than others. In my experience, Zote is a REALLY soft soap. It can be a mess to try and grate. Out of curiosity, I grated up a bar and let the shavings dry out for a month. (or two... I forgot it was there!) The difference in weight was amazing. A completely dried out bar of Zote was close to 10oz! The volume of shavings also dropped A LOT!  That would make a big difference when measuring soap by the bar or cup! It's really no wonder the results can be so varied with the same recipe. What we need is a way to make this predictable with every batch.

That little red line marks how much soap I started with. Crazy, right?

In the future, I plan on grating and drying out a new bar of soap long before I need it, and then measuring equal amounts soap, borax, and washing soda by volume. If your shavings are large, you may have to put the soap and some of the washing soda in a food processor to break it down further. This helps to keep everything evenly distributed. I recommend throwing a hand towel over the machine, as there will be a small cloud of soap dust and it will make you want to gag.

Having said all that, I must admit that I don’t use homemade stuff for all my laundry. I used Ecos free and clear for cloth diapers (although I no longer CD, thanks to ammonia issues). My musty summer towels and nasty kitchen washcloths never got fully clean with Ecos. The smell would cling, or reappear with a vengeance as soon as the washcloth got wet. After one wash with double strength homemade soap, the smell was GONE! I am impressed. I need to re-test the hubby's workout clothes to make a final decision. I used to keep a small bottle of original Tide handy for big cleaning jobs, but not anymore. I'm too cheap. Man-smell is almost impossible to kill without the enzymes in Tide, so workout clothes will be my ultimate test.

Anyone else use homemade laundry soap? What kinds of bar soap have you used and which do you like best? I really can't decide and it's driving me nuts!

UPDATE 2013: I pretty much stick with Fels Naptha for convenience. I let the bar air dry for at least a month before grating. This will give you nice, fine shavings that will stay evenly distributed throughout the mix. I no longer bother running hot water on the soap before loading clothes, it doesn't seem to make a difference. My current "recipe" is equal parts dried soap shavings, borax, and washing soda; occasionally I will add Oxyclean (usually generic) if I have it on hand, same proportions as the rest. I still use 2Tbsp per load. Try it, you'll like it!

Monday, September 17, 2012

Butternut Ginger Soup

No, I don't retouch my photos.

OK, so this is going to be a quickie recipe share. I whipped up a batch of this thick, creamy soup from broth I had made the day before. I really wish I had made twice as much! I have a horrible habit of not measuring when I cook, but this is one of those soups you really don't need to be specific with. I plan on freezing this and will update if it holds up well!

BUTTERNUT GINGER SOUP            Yield: approximately 3 quarts


1 large butternut or other winter squash. I think I used a 3.5 lb squash.
3 large garlic cloves, smashed
1.5 Tablespoons (give or take) minced fresh ginger. mmmmm...
Dash or two of ground cloves (I think I used maybe 1/4tsp total)
Dash or two of ground cinnamon (maybe 1/2 tsp? I really hate measuring spices.)
Enough beef or chicken broth to cover everything. I used about a quart of broth initialy.

Toss everything in your pot and simmer until the squash is cooked and starting to fall apart as you stir. Using either a stick blender or a regular blender (be careful with the hot liquid!) blend until smooth. Add more broth if needed to reach your desired consistency. At this point, you can taste to see if you want more salt or seasonings. My broth was just salty enough that I didn't add a thing.

I somehow managed to have the right amount of everything where the ginger and spices were just strong enough to compliment, but not overpower the squash. Hopefully I can duplicate the perfection when I make it again. I'm not one for pureed soups, but this will become an autumn staple for sure!

Wednesday, May 30, 2012

Balsamic Pickled Asparagus


I know, this is rather late in the season for asparagus, but think of it as being prepared for next spring! I made these on the same day that I canned all my marmalades, but for some reason I never got around to posting about it.

Asparagus seems to be one of those "love it or hate it" veggies. For some people, its more of a "love it now, hate it later" veg. Don't ask why. It's awkward. Me, I'm a "love it now, pretend I don't mind later" gal. True to my current (but slightly less fervent, thanks to impatience) commitment to preserving foods in season, I decided to see if there was a way to preserve asparagus during the brief time that it enters the "reasonably affordable" stage. Asparagus out of season is crazy expensive!

Since asparagus is a low-acid food and I don't have a pressure canner, the only way I was going to be able to can them is by making pickles or jelly. Asparagus jelly doesn't sound particularly appealing. Pickles it is!

Whilst perusing the interwebz, I found this recipe from My Pantry Shelf. A pickled asparagus recipe that calls for lemons? How convenient! I just happened to be inundated with lemons! Plus, the jars looked gorgeous with the bright green asparagus and perky yellow lemons. This I gotta try!

Right about now, you might be wondering why my pictures look nothing like those for the original recipe. I'll tell ya why. I did a no-no. I changed a canning recipe. This is Cardinal Rule #1 in canning land. You're supposed to ONLY use USDA approved recipes, and NEVER alter them. Don't get me wrong, there is a real science to preserving food to make it safe, especially when using the water bath canning method. BUT, we're talking pickles right now. Pickles rely on large quantities of vinegar to acidify the recipe, making it impossible for botulism spores to grow.

The only change I made to the recipe was to sub some balsamic vinegar for the white vinegar. I did this because I'm not actually a big fan of pickles. Oh I like them every once in a while, but most homemade pickles have disinterested me. I decided that if I was going to go through the trouble of canning up asparagus, I needed to make it something I would actually eat (not to mention something worth using asparagus instead of cukes). Balsamic vinegar goes fabulously with asparagus. It also happens to be my favorite cooking vinegar, and you'll (hopefully) be seeing several other recipes on here that feature it.

Why do I feel the alteration was safe? Because Rule #1 in pickling is do NOT monkey with the acidity level. My white vinegar has a 5% acidity level. According to my bottle of balsamic, it has an acidity level of 6%. Instead of lowering the acidity, the switch would actually INCREASE it. So that's why I didn't feel bad about changing the recipe. I've eaten 2.5 of the jars (by myself, thankyouverymuch) in the two months since I made them, and so far there are no signs of spoilage or off-flavors.

The one down side, of course, is the dark balsamic ruins the beautiful lemon-asparagus look of the jars. I don't mind too much. I'd rather have ugly food that tastes amazing, than have a shelf full of pretty doorstops.

Ok, on to the recipe! Since my modification is so minor, I'm only going to give you my ingredient list and then send you back to the original post for canning instructions. That, and I'm too lazy to type it all up. I need to do something about that.


Balsamic Pickled Asparagus

3lbs asparagus
1 1/2c distilled white vinegar
1c balsamic vinegar (make sure it's at least 5% acidity)
2 1/2c water
2 1/2 tsp pickling salt (I used kosher sea salt)
3 tsp mustard seed
6 cloves garlic, peeled
1 lemon, sliced

See My Pantry Shelf for canning instructions. I had plenty of extra pickling liquid after filling up the jars of spear tips, so for kicks I filled a jar with the trimmed asparagus ends. Not the woody parts, although I plan to try them out too, but the fresh bits that were sacrificed so the tips would fit. I have to say, they were every bit as good as the tips, if not as pretty. I'll definitely do that again, as wasting good asparagus is just plan wrong.

 I recommend letting these sit for at least two weeks to mellow. The first jar I opened was kick-your-rear strong in the vinegar department. Two months later they are nice and gently tangy. These would be great on a crudite tray, or wrapped in salami as an appetizer. Or, y'know, eaten straight from the jar, as I like 'em.

Saturday, May 19, 2012

Spring Preserving, Part 2: Preserved Lemons


After canning the marmalades, I was still drowning in lemons and grapefruits. I realized I was going to have to get creative, and quick!

Other than marmalade, the only other recipe that I came across featuring lemons was called (drumroll please...) Preserved Lemons! I know, clever. It's essentially lemons preserved in gobs of salt, and is a mainstay of Moroccan cuisine. I danced around the idea for quite a while before giving it a try. After all, what do I do with salty lemons? I don't have any interest in Moroccan food. But, with a huge bowl of lemons calling to me, I figured what the heck.

There's no rocket science to this. Many recipes have you keep the lemons whole, but I sliced them into 6 sections. The rind is primarily used, so I figured I would be more likely to use it if it was easier to cut up, and in smaller portions. Once your lemons are all sliced, dump a lot of salt into a jar. Then add a layer of lemons. Then add another gob of salt. Then lemons, then salt, etc., ending with salt. When you get to the top of the jar, press down hard on the lemons until they start releasing their juice. You want to make sure the lemons are completely covered by the salty liquid. (Once again, you don't want to do this if you have any cuts on your hands. Unless you're a kitchen badass. Or just a masochist.) If your lemons don't release enough juice to cover them completely, add the juice of another lemon (or the bottled stuff, no shame in it) until you have enough. Now cap your jar and let it sit at room temperature for up to a week before moving it to the fridge.

When I made these, I followed the typically prescribed method of giving the jar a shake every now and again while it sat out. Thanks to my dependable forgetfulness, my jar sat out way longer than a week. After the first week, I tasted the rind and was surprised by how much I liked it! While it is a bit salty, the fresh lemon taste is completely preserved. I added a finely diced rind to a salad and loved the burst of flavor. I decided this was definitely a condiment I wanted chillin' in my fridge for spontaneous cooking experiments.

Unfortunately, after what was probably more than two weeks at room temp, my jar went from a bright lemon scent to... not so bright. Perhaps my lemons weren't well scrubbed before brining, or perhaps the fork I used to remove a rind was not clean enough, or some other variable I can't think of. Given the sheer quantity of salt I added, it's a miracle anything managed to grow in there!

[Um, Maria, if you look at your own picture, your lemons are CLEARLY not covered in lemon juice. Maybe THAT was your problem, Genius! And why the heck didn't you put them in the fridge after tasting them the FIRST time? You're not the brightest crayon in the box, are you?]

I hate when I yell at me, it's so degrading.

Either way, these went from yum to yuck and I had to dump the whole jar. Swallow sadness. I want to try this again, but next time make sure everything is sterile. Also, instead of shaking the jar regularly, which shouldn't be necessary if everything's well covered by juice, I may try adding a layer of olive oil to the top. That ought to seal out air pretty well. I'm trying to brine the lemons, not ferment them, after all! I read this tip on the blog mybissim.com and it's worth a try!